ROS2 1일차 Gazebo 월드 생성 및 모델
2024. 9. 19. 15:38ㆍROS2/기초
모델 불러오기
git clone http://github.com/osrf/gazebo_models1. /.gazebo/models 폴더에 model 파일 옮김
Models 구조
1. model.config
2. model.sdf (structure, physical informations ...)
- pose (X Y Z R P Y) : 설치 될 때 위치(자동 생성 시)
- static (true or false) : true는 고정 false는 움직임
- link(inertial, collision, visual)
- inertial: 모델의 물리적 성질(질량과 관성)을 정의합니다.
- collision: 모델의 물리적 충돌 영역을 정의하여 시뮬레이션 중 충돌을 처리합니다.
- visual: 모델의 시각적 외관을 정의하여 시뮬레이션에서 모델이 어떻게 보일지를 결정합니다.
Gazebo ROS 2 통합 패키지 설치
1. ros2는 ros1과 다르게 통합 패키지 설치가 필요함
sudo apt update
sudo apt install ros-foxy-gazebo-ros-pkgs
2. 환경 설정 (패키지 설치 후, ros2 환경 설정 파일을 소스하여 패키지 경로가 제대로 설정되었는지 확인)
source /opt/ros/foxy/setup.bash
3. 설치 확인
ros2 pkg list | grep gazebo_ros
Gazebo 및 Gazebo ROS 패키지 실행
1. Gazebo 서버와 클라이언트 실행
ros2 launch gazebo_ros gzserver.launch.py
ros2 launch gazebo_ros gzclient.launch.py
2. spawn_entity 서비스를 사용하여 모델 스폰
ROS2에서는 spawn_entity.py 스크립트를 사용하여 Gazebo에 모델 스폰 가능 gazebo_ros 패키지에 포함되어 있으며,
터미널에서 서비스 호출을 통해 모델을 스폰할 수 있음
ros2 run gazebo_ros spawn_entity.py -file /path/to/your/model.sdf -entity my_model -x 1 -y 2 -z 0.5
각 옵션 설명:
- -file /path/to/your/model.sdf: 스폰할 모델의 SDF 파일 경로입니다.
- -entity my_model: 스폰할 모델의 이름입니다.
- -x 1 -y 2 -z 0.5: 모델이 스폰될 좌표입니다. (따로 지정하지 않으면 sdf내부에 있는 좌표로 생성)
박스 모델 생성
cd ~/abc_ws/src/studying_gazebo
mkdir -p models/box_model
cd models/box_model
touch model.config
touch model.sdf
1. model.config
<?xml version="1.0"?>

<model>
    <name>Box Model</name>
    <version>1.0</version>
    <sdf version="1.6">model.sdf</sdf>

    <author>
        <name>ch</name>
        <email>abc@gmail.com</email>
    </author>

    <description>
        A simple box model
    </description>
</model>
2. model.sdf
<?xml version='1.0'?>
<sdf version="1.4">
    <model name="box_model">
        <pose>0 0 0.5 0 0 0</pose>
        <static>false</static>
        <link name="link">
            <inertial>
                <mass>1.0</mass>
                <inertia>
                    <ixx>0.083</ixx>
                    <ixy>0.0</ixy>
                    <ixz>0.0</ixz>
                    <iyy>0.083</iyy>
                    <iyz>0.0</iyz>
                    <izz>0.083</izz>
                </inertia>
            </inertial>
            <collision name="collision">
                <geometry>
                    <box>
                        <size>1 1 1</size>
                    </box>
                </geometry>
            </collision>
            <visual name="visual1">
                <geometry>
                    <box>
                        <size>1 1 1</size>
                    </box>
                </geometry>
            </visual>
        </link>
    </model>
</sdf>
이후 마우스로 불러오고 싶으면 Gazebo insert > add path > 폴더 추가
collision 설정했을때와 하지 않았을때 차이
<?xml version='1.0'?>
<sdf version="1.4">
    <model name="box_model">
        <pose>0 0 0.5 0 0 0</pose>
        <static>false</static>
        <link name="link">
            <inertial>
                <mass>1.0</mass>
                <inertia>
                    <ixx>0.083</ixx>
                    <ixy>0.0</ixy>
                    <ixz>0.0</ixz>
                    <iyy>0.083</iyy>
                    <iyz>0.0</iyz>
                    <izz>0.083</izz>
                </inertia>
            </inertial>
            <collision name="collision">
                <geometry>
                    <box>
                        <size>1 1 1</size>
                    </box>
                </geometry>
            </collision>
            <visual name="visual1">
                <geometry>
                    <box>
                        <size>1 1 1</size>
                    </box>
                </geometry>
            </visual>
            <visual name="visual2">
                <pose>0 0 1 0 0 0</pose>
                <geometry>
                    <cylinder>
                        <radius>0.25</radius>
                        <length>1.5</length>
                    </cylinder>
                </geometry>
            </visual>
        </link>
    </model>
</sdf>
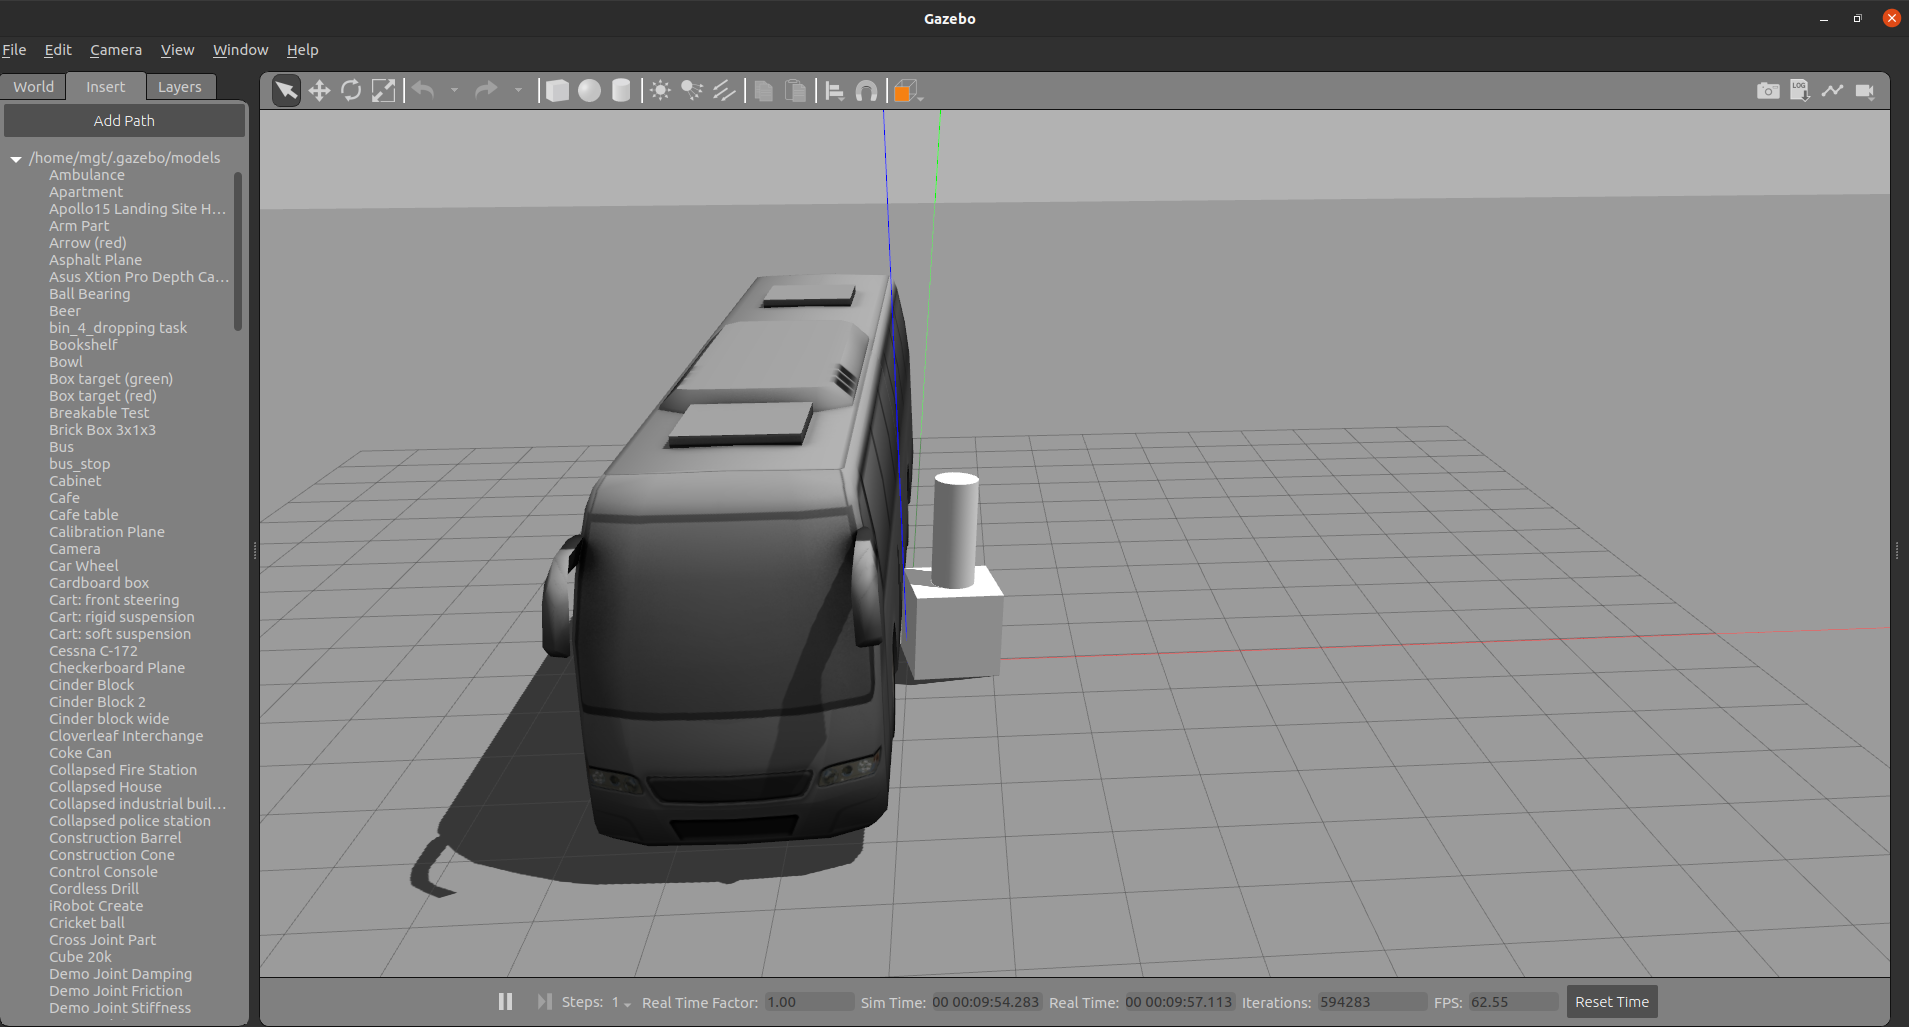
위 코드는 박스위에 원기둥을 생성하고 박스는 collision을 true하고 원기둥은 false 설정
view탭에서 collision을 체크하면 바닥과 박스까지 주황색이 됨.
그리고 다른 물체 생성시 원기둥은 통과하지만 박스는 충돌이 일어남


'ROS2 > 기초' 카테고리의 다른 글
| ROS2 2일차(5) tf2 (0) | 2024.09.20 |
|---|---|
| ROS2 2일차(4) topic 프로그래밍 (0) | 2024.09.20 |
| ROS2 2일차(3) topic (0) | 2024.09.20 |
| ROS2 2일차(2) launch (0) | 2024.09.20 |
| ROS2 2일차(1) node (0) | 2024.09.20 |